Proxy Integration With ZeroOmega
This guide will show you how to set up Anonymous Proxies' residential proxies in ZeroOmega and switch between them easily to hide your IP.
What is ZeroOmega?
ZeroOmega is an open-source proxy manager extension for Firefox and Chromium-based browsers like Chrome and Edge. It lets you save multiple proxy setups as named profiles, then switch your browser traffic between them straight from the toolbar. It is a modern continuation of the classic SwitchyOmega style workflow, updated for today’s extension standards, including Manifest V3 support, so you get the same “set it once, switch anytime” experience with smoother control.
What makes ZeroOmega especially useful is that it can be both manual and rule based. You can keep everyday browsing direct, send only specific websites through a proxy profile, and avoid constantly rewriting settings when your workflow changes.
ZeroOmega Features
- Profile library. Create a set of named proxy profiles for different locations or tasks, then pick the one you need without setting everything up again.
- One click switching. Swap profiles instantly from the extension popup instead of digging through browser settings.
- Direct mode. Turn proxying off immediately when you want to browse normally.
- Auto Switch rules. Route specific domains or URL patterns through the right profile automatically, while everything else follows your default.
- Import and export backups. Export your setup for safekeeping and restore it fast after a reinstall or on another browser.
ZeroOmega is only a proxy manager, not a proxy provider, so your experience depends on the proxies you connect to it. It is best to avoid free proxy lists since they are usually slow, unstable, and can even create privacy risks. For more authentic results in your tasks, use Anonymous Proxies' premium residential proxies. You will get a more reliable browsing footprint, faster performance, and far fewer random disconnects.
How to Set Up Proxies With ZeroOmega?
Before you touch ZeroOmega, sign in to Anonymous Proxies dashboard and keep your proxy details ready. I will walk you through the flow using residential proxies, but the exact same setup will still work for both our datacenter or mobile proxies.
If you are using Anonymous Proxies SOCKS5 proxies that require a username and password, set ZeroOmega up in Firefox. Chrome based browsers often do not handle SOCKS5 authentication inside extensions reliably.
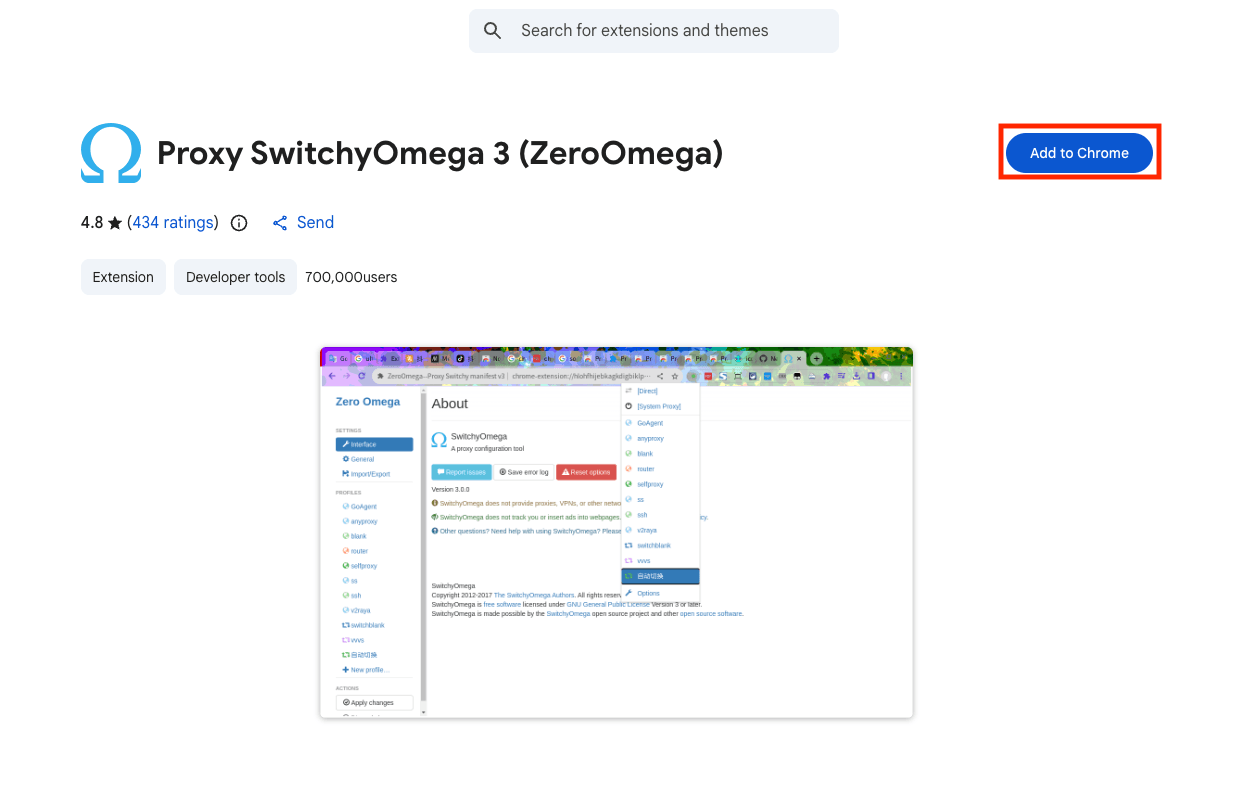
Step 1: Set up the ZeroOmega extension
For the first step, we'll need to install the official ZeroOmega extension from the Chrome Web Store or Firefox Add-ons.
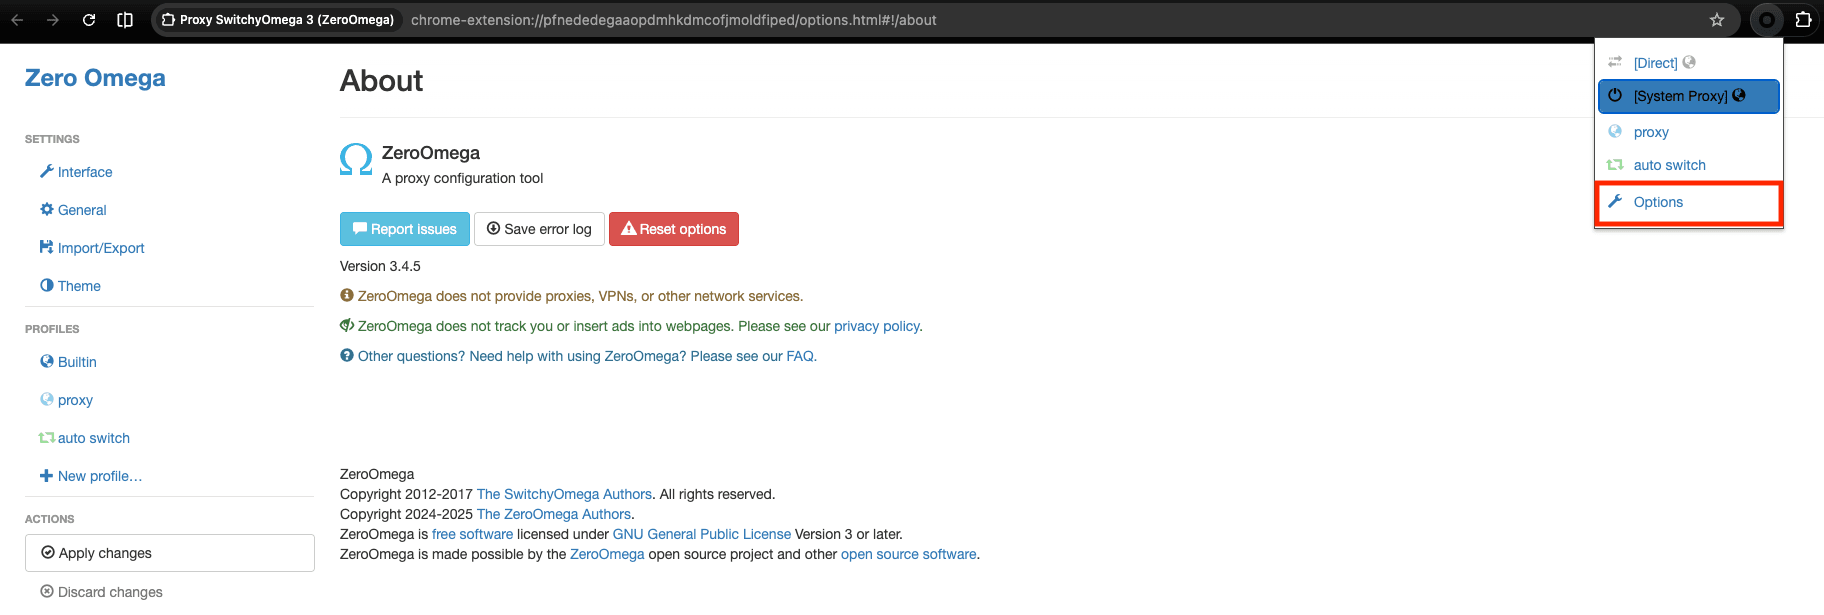
Step 2: Open ZeroOmega Options
Once it is installed, pin it to your toolbar so you can access it quickly, then click the ZeroOmega icon in your browser toolbar and then click on Options.
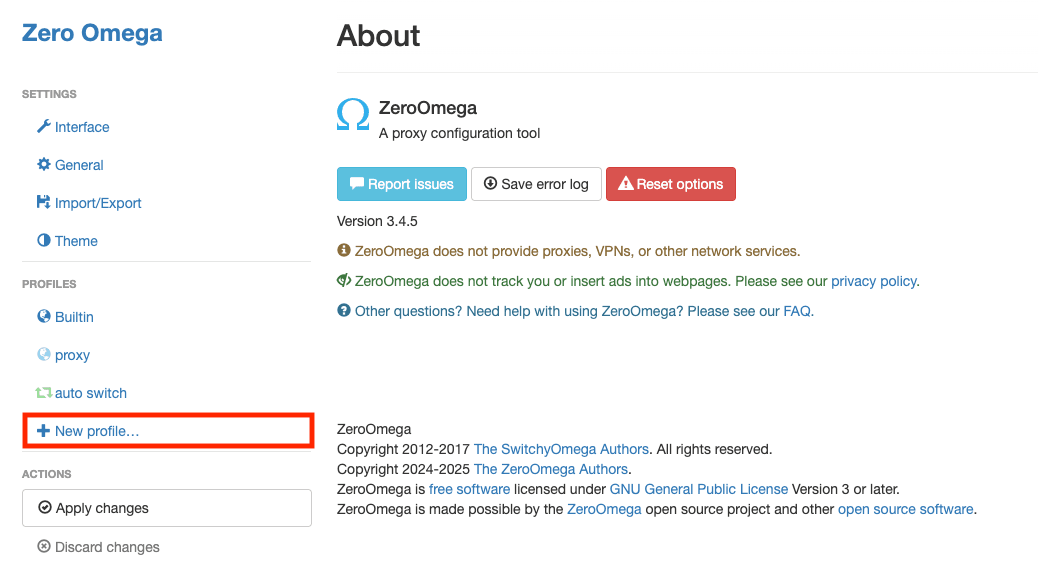
Step 3: Create a new proxy profile
After you clicked on Options, ZeroOmega dasboard will open, and once it opens, in the left sidebar, click on New profile.
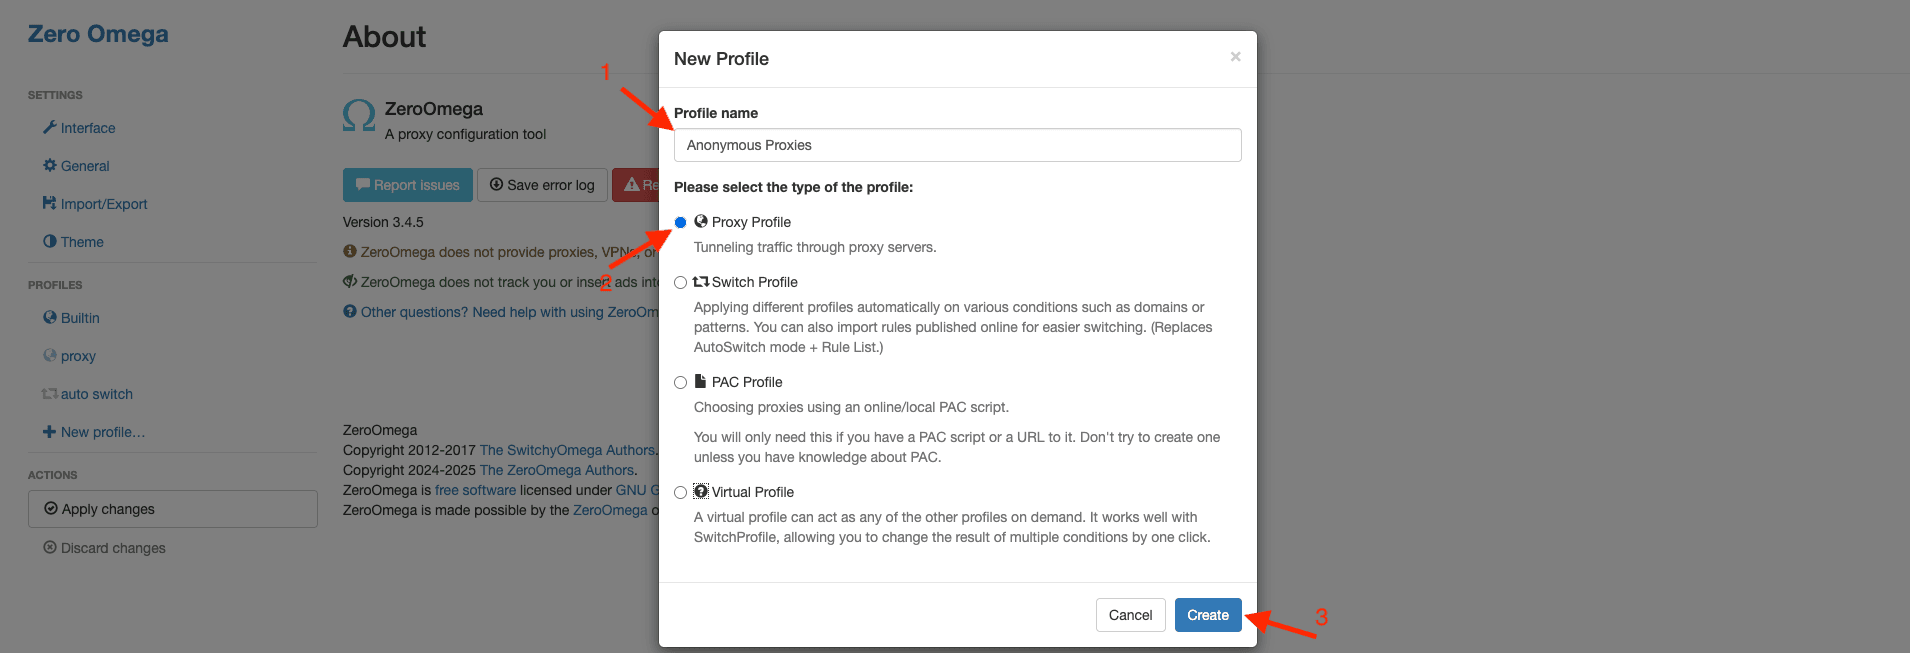
A pop-up will appear where you will need to enter a name for your profile, select Proxy Profile, and then click on Create.
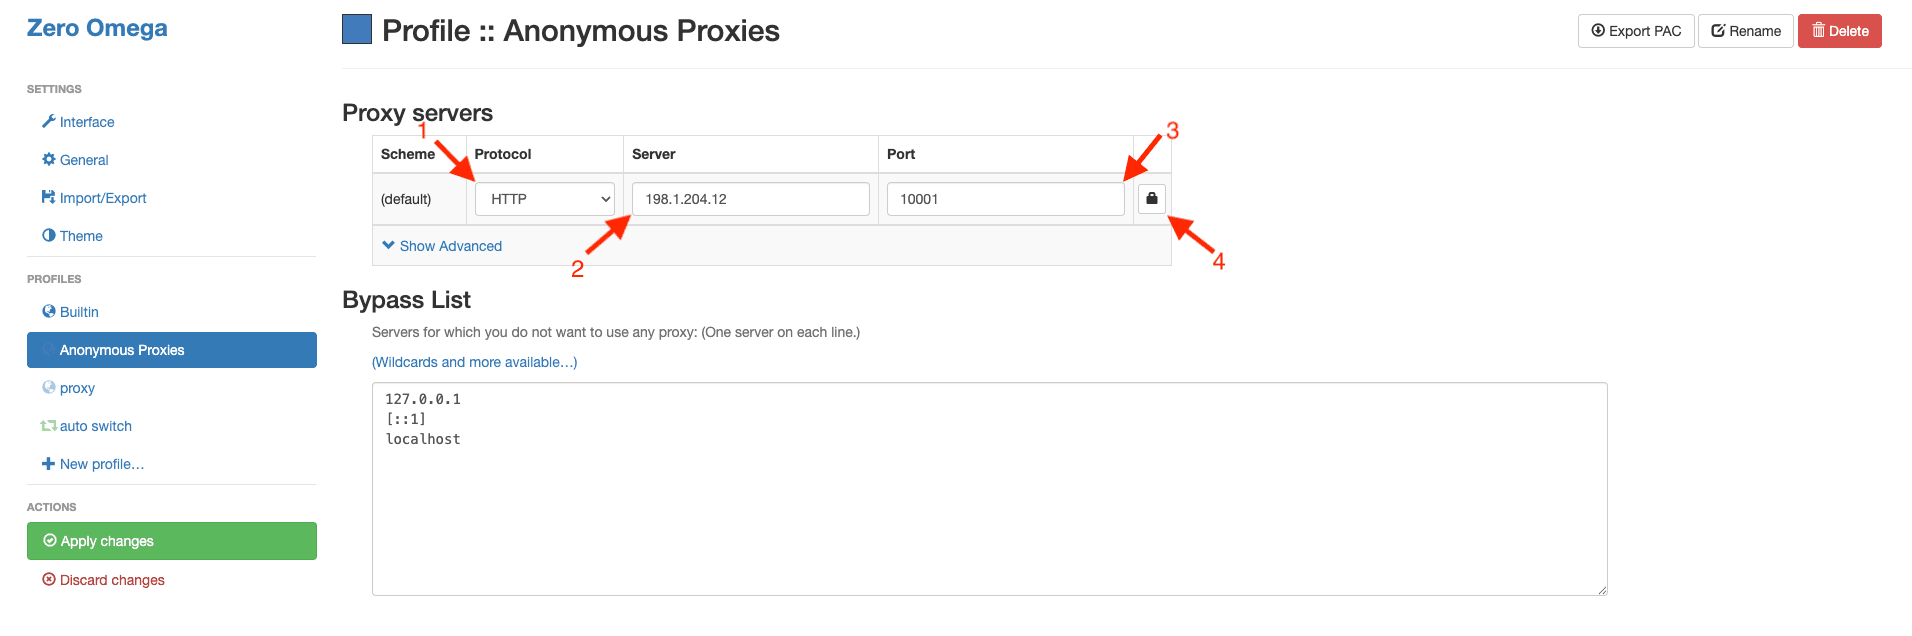
Step 4: Enter your proxy server details
Then, once you are inside your new profile, you'll need to select the correct protocol you are going to use from the dropdown, then paste the proxy server address into the Server field and the proxy port into the Port field using the proxy details from Anonymous Proxies dashboard. Once you filled all these fields, click the small lock icon next to the port.
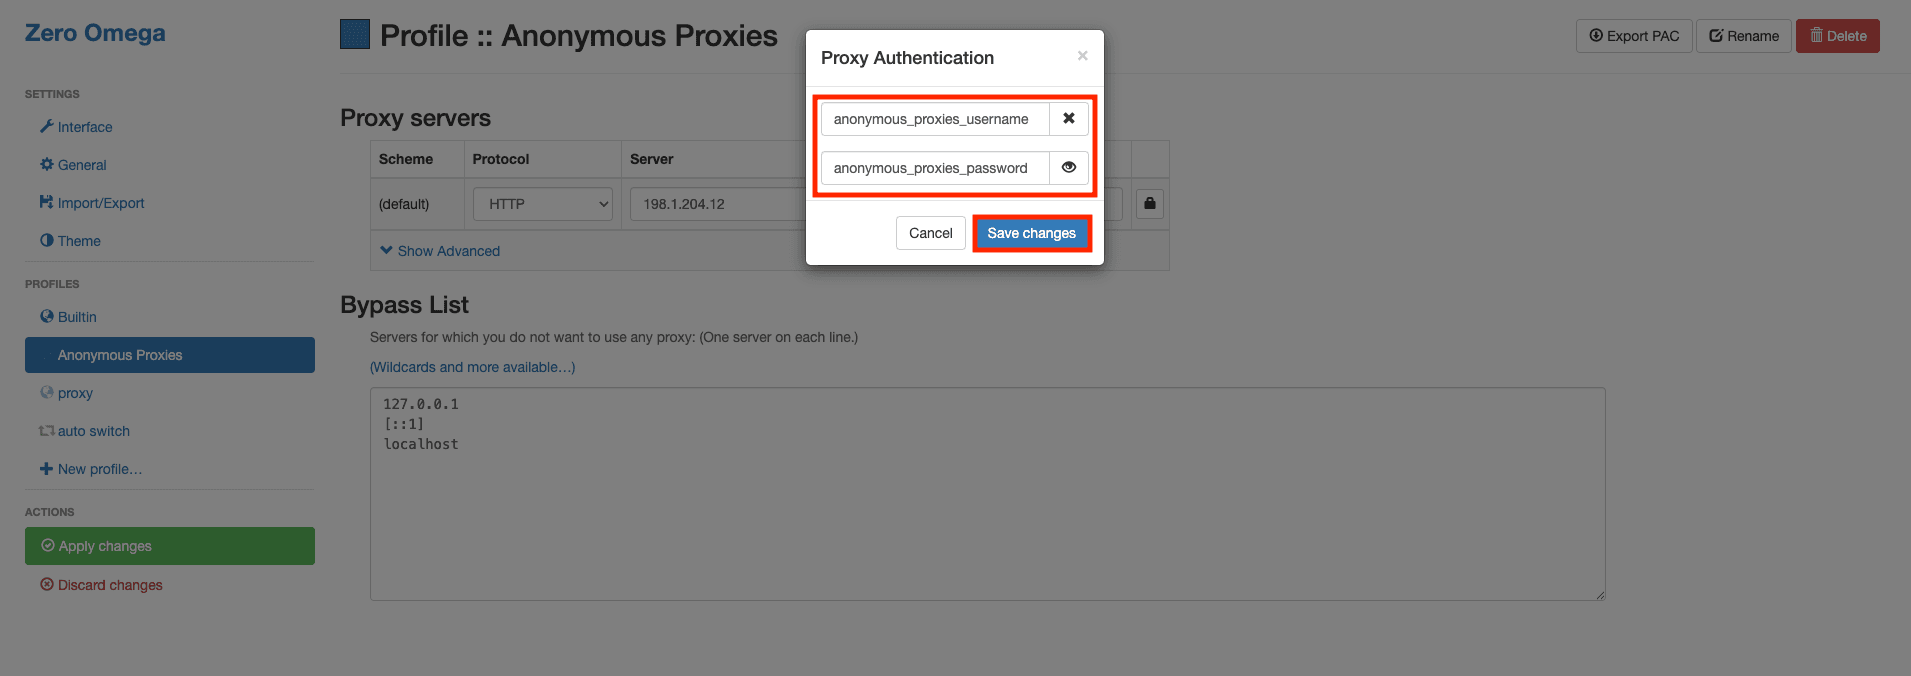
Step 5: Enter proxy credentials
Once you clicked the lock icon, you'll see the authentication window. Here, be sure that you enter your user credentials that you can find in Anonymous Proxies dashboard, then save the changes.
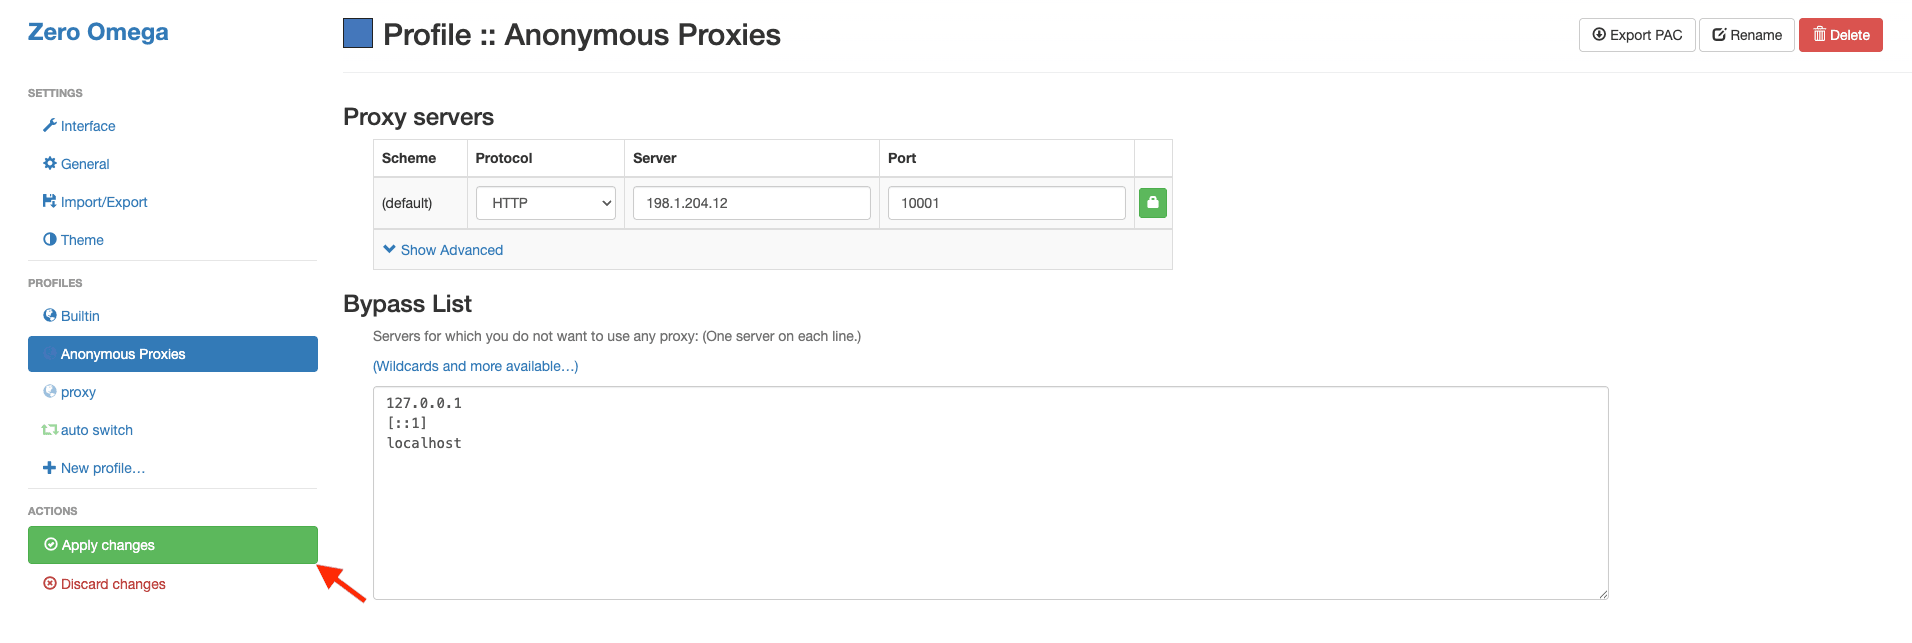
Step 6: Apply changes
Once you filled all the required fields, on the left side, click on Apply changes.
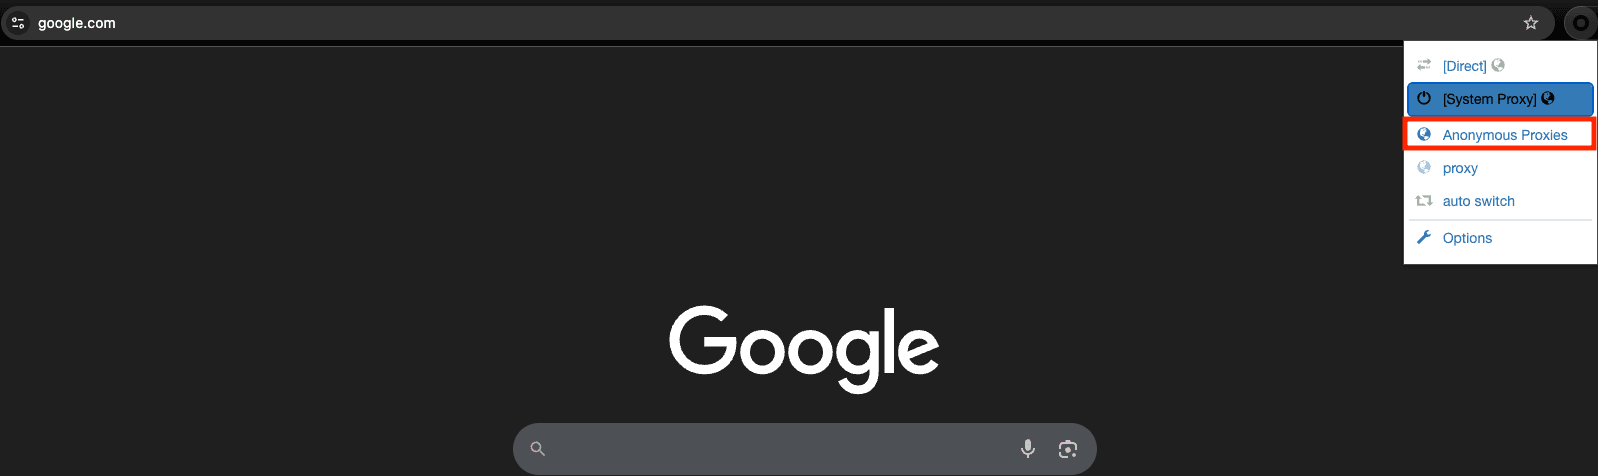
Step 7: Activate the proxy profile
Now, it's time to choose our new profile by clicking the ZeroOmega icon again and select the profile we've just created.
Step 8: Test proxy
Once you select the profile you've created, you can go to an IP checking website to confirm that your public IP has changed.
Wrap Up
ZeroOmega, previously known as SwitchyOmega, is an easy and reliable way to manage proxy profiles in Firefox and Chromium-based browsers. Once you have your profiles saved, you can swap locations or setups in seconds, without touching your system network settings, which is perfect for geo based checks, everyday research, and automation work.
If you run into issues during setup or you are unsure which proxy type makes the most sense for your use case, our support team is available 24/7 to help you out. And if you want more practical tutorials for other third party tools, visit our integrations page for additional step by step guides.

Buy Backconnect Proxies
Rotating IPs on every request. Scale scraping and automation without manual IP management.
More proxy-browser-extension Proxy Integrations
See more proxy-browser-extension integrations that work seamlessly with Anonymous Proxies.