
This guide explains how to integrate Anonymous Proxies with Selenium for efficient web scraping and testing in Python, Java, Node.js and .NET.
HTTP Proxies are handling HTTP requests towards the internet on behalf of a client. They are fast and very popular when it comes to any kind of anonymous web browsing.
SOCKSv5 is an internet protocol that is more versatile than a regular HTTP proxy since it can run on any port and traffic can flow both on TCP and UDP. Useful in games and other applications that do not use the http protocol.
Selenium is an open-source automation framework that performs quality testing of web applications across different browsers and platforms. Selenium enables developers and testers to automate interaction with a web browser, supporting functional, regression and other kinds of tests, as well as web scraping. Moreover, Selenium supports multiple programming languages like Python, Java, C# and JavaScript.
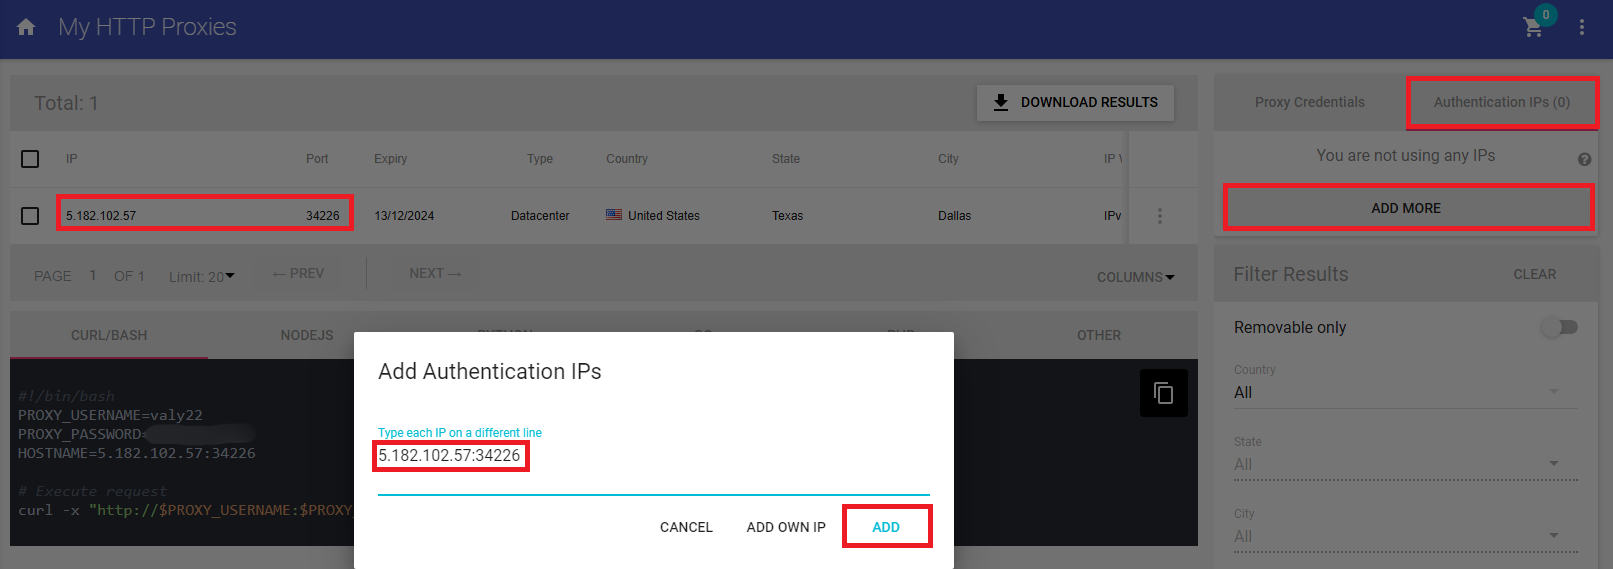
Here are the requirements and step-by-step procedures that you need in order to configure your authenticated proxies with Selenium using Python, Node.js, Java, and .NET. Also, if you whitelisted your proxy's IP, then there is no need to enter your username and password - the same as in Anonymous Proxies Dashboard.
Java JDK: Install the Java Development Kit (JDK) from the official Java website.
.NET SDK: Head over to the Microsoft .NET website to download and install the .NET SDK.
Python and pip: If you're working in Python, be sure to download both Python and pip, and its package installer from the official website.
WebDriver Setup: Selenium interacts with web browsers through WebDriver, so you'll need the right driver for your browser. Download ChromeDriver if you're using Chrome or GeckoDriver if you prefer Firefox.
In this guide, we are going to work with Chrome, so be sure that you downloaded ChromeDriver and set it up in your system's PATH.
pip install selenium-wire
from seleniumwire import webdriverfrom selenium.webdriver.chrome.options import Optionsfrom selenium.webdriver.chrome.service import Servicefrom selenium.webdriver.common.by import Byfrom webdriver_manager.chrome import ChromeDriverManagerproxy_username = "your_username"proxy_password = "your_password"proxy_address = "123.456.789.0"proxy_port = "8080"proxy_url = f"http://{proxy_username}:{proxy_password}@{proxy_address}:{proxy_port}"seleniumwire_options = {"proxy": {"http": proxy_url,"https": proxy_url,},}chrome_options = Options()chrome_options.add_argument("--headless=new")driver = webdriver.Chrome(service=Service(ChromeDriverManager().install()),seleniumwire_options=seleniumwire_options,options=chrome_options)driver.get("https://httpbin.org/ip")print(driver.find_element(By.TAG_NAME, "body").text)driver.quit()
npm install selenium-webdriver
const { Builder, By } = require('selenium-webdriver');const chrome = require('selenium-webdriver/chrome');const proxyAddress = "123.456.789.0";const proxyPort = "8080";const proxyUsername = "your_username";const proxyPassword = "your_password";const proxyURL = `http://${proxyUsername}:${proxyPassword}@${proxyAddress}:${proxyPort}`;const options = new chrome.Options();options.addArguments(`--proxy-server=${proxyURL}`);options.addArguments("--headless");(async function example() {let driver = await new Builder().forBrowser('chrome').setChromeOptions(options).build();try {await driver.get('https://httpbin.org/ip');const bodyText = await driver.findElement(By.tagName('body')).getText();console.log(bodyText);} finally {await driver.quit();}})();
If you use Maven, then you need to add BrowserMob Proxy dependency to your pom.xml:
<dependency><groupId>net.lightbody.bmp</groupId><artifactId>browsermob-core</artifactId><version>2.1.5</version></dependency>
import net.lightbody.bmp.BrowserMobProxy;import net.lightbody.bmp.BrowserMobProxyServer;import net.lightbody.bmp.client.ClientUtil;import org.openqa.selenium.Proxy;import org.openqa.selenium.WebDriver;import org.openqa.selenium.chrome.ChromeDriver;import org.openqa.selenium.chrome.ChromeOptions;public class ProxyAuthExample {public static void main(String[] args) {BrowserMobProxy proxy = new BrowserMobProxyServer();proxy.start(0);proxy.autoAuthorization("123.456.789.0", "your_username", "your_password");Proxy seleniumProxy = ClientUtil.createSeleniumProxy(proxy);ChromeOptions options = new ChromeOptions();options.setProxy(seleniumProxy);options.addArguments("--headless");WebDriver driver = new ChromeDriver(options);try {driver.get("https://httpbin.org/ip");System.out.println(driver.getPageSource());} finally {driver.quit();proxy.stop();}}}
Use the NuGet Package Manager:
Install-Package Selenium.WebDriverInstall-Package Selenium.WebDriver.ChromeDriver
For the C# example, go and whitelist your IP in the Anonymous Proxies Dashboard. This way, you can connect without entering your username and password credentials, since if you want to handle proxy authentication directly in Selenium is a pretty complicated process.

using OpenQA.Selenium;using OpenQA.Selenium.Chrome;using System;namespace SeleniumProxyExample{class Program{static void Main(string[] args){var proxyAddress = "123.456.789.0:8080";var options = new ChromeOptions();options.AddArgument($"--proxy-server=http://{proxyAddress}");options.AddArgument("--headless");using (IWebDriver driver = new ChromeDriver(options)){driver.Navigate().GoToUrl("https://httpbin.org/ip");Console.WriteLine(driver.FindElement(By.TagName("body")).Text);}}}}
Selenium is a very powerful tool, both for web scraping and for automated browser interaction and if you combine it with Anonymous Proxies, you are going to get the most out of it. Now, if you have any further questions about integrating Anonymous Proxies with Selenium, don't hesitate to contact our support team. For more integration tutorials, check our integrations page.
You’ll always need to adjust your username and your password fields with the username and password credentials that are in the Anonymous Proxies Dashboard if you didn't whitelisted your IP.
@2025 anonymous-proxies.net