

Proxifier allows network applications that do not support working through proxy servers to operate through a SOCKS or HTTPS proxy and chains.
HTTP Proxies are handling HTTP requests towards the internet on behalf of a client. They are fast and very popular when it comes to any kind of anonymous web browsing.
SOCKSv5 is an internet protocol that is more versatile than a regular HTTP proxy since it can run on any port and traffic can flow both on TCP and UDP. Useful in games and other applications that do not use the http protocol.
Proxifier is a powerful desktop application that allows any application to route internet traffic through a proxy server, even if the application doesn’t support proxies by default. It is perfect for anyone who want to protect themselves because with Proxifier you can hide your IP address pretty easy. Moreover, Proxifier supports both SOCKS and HTTPS proxies, so there is no need to worry about application restrictions.
This tool is also very useful for businesses: for example, if a company has remote teams using different software, Proxifier makes it easy for IT managers to route and monitor all internet traffic through specific proxies, improving security and control from one central place. Unlike traditional VPNs, Proxifier optimizes routing paths for faster connections and uses encrypted channels, all without the heavy system load which is typically associated with VPNs.
Proxifier includes a 31-day free trial, after which a lifetime license is available for $39.95. Besides this, you should keep in mind that the software doesn't come with a proxy, so you must buy a proxies from a reliable provider.
If you haven't installed Proxifier yet, then don't worry, because below you'll find a step-by-step guide on how to install and configure Proxifier.
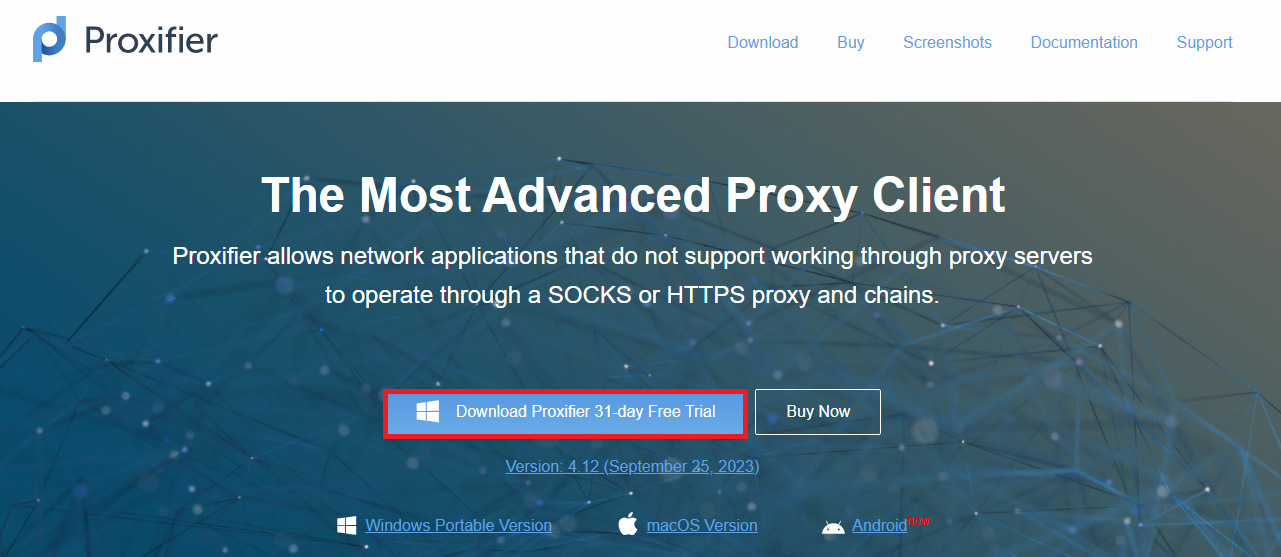
First, download and install Proxifier from the official website and be sure that you choose the version that matches your operating system. In this example, we'll use Windows, but if you're on macOS there is not need to worry because the setup process is quite similar.
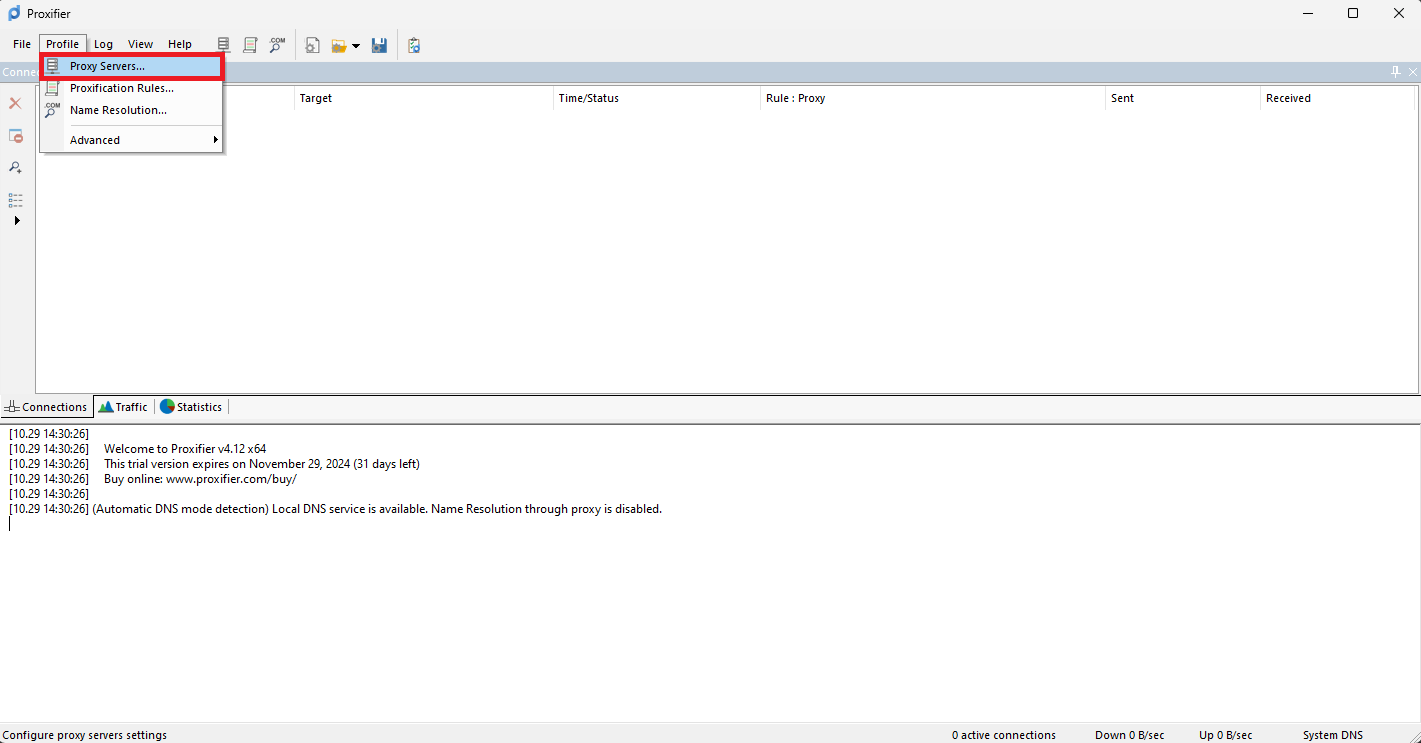
Now, when you lauch Proxifier you should click on the Profile menu and select Proxy Servers.
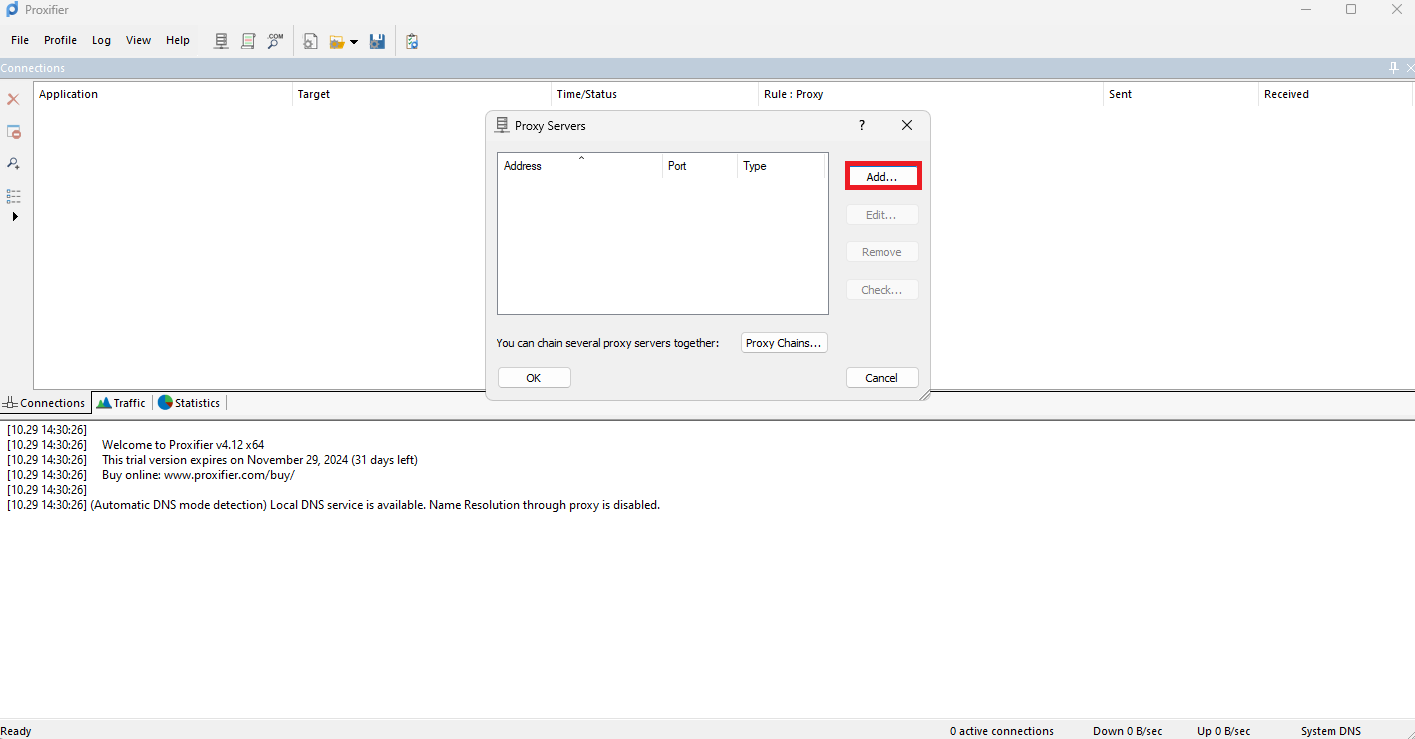
Click on the Add button so you can select your proxy.
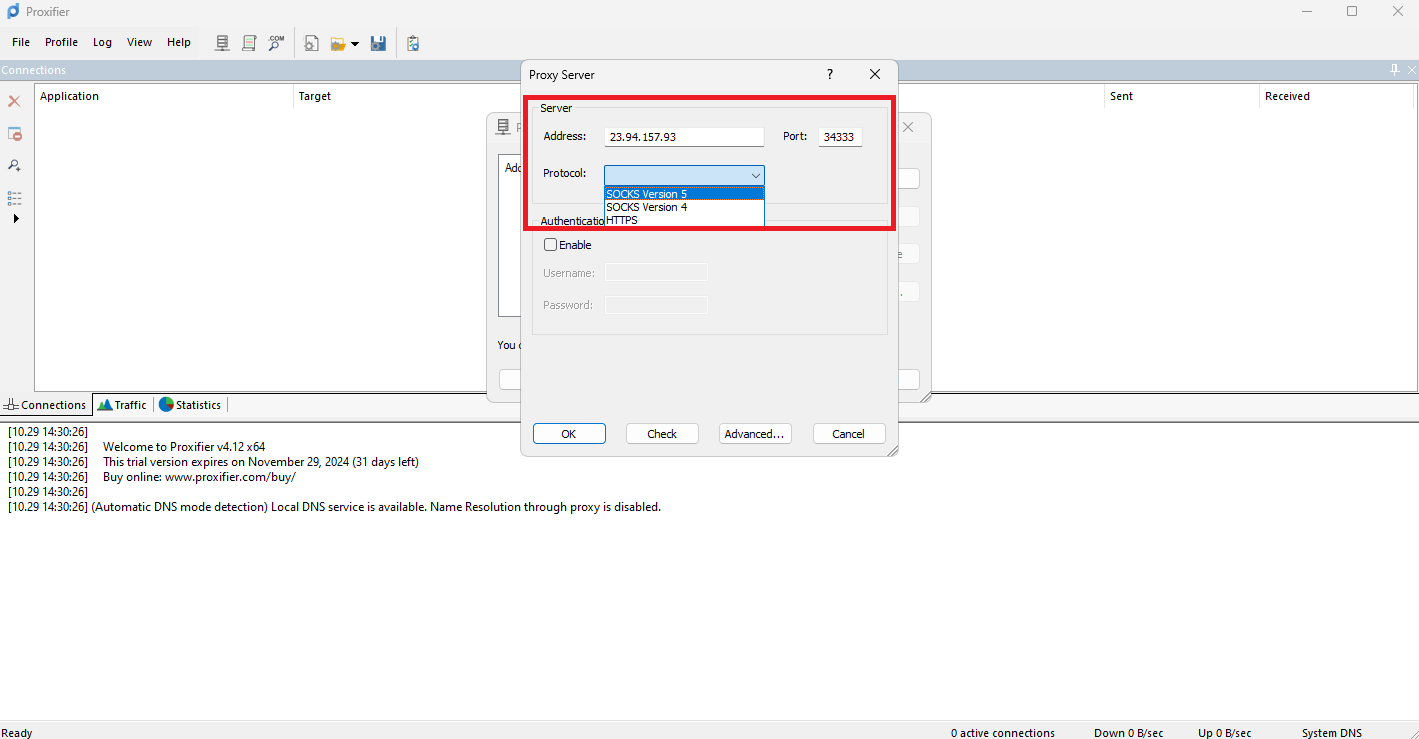
In this step, select your protocol type (HTTPS or SOCKS5) and manually enter the proxy server’s information:
192.168.100.5.Example IP: 192.168.100.5
Example Port: 192.168.100.5:8080
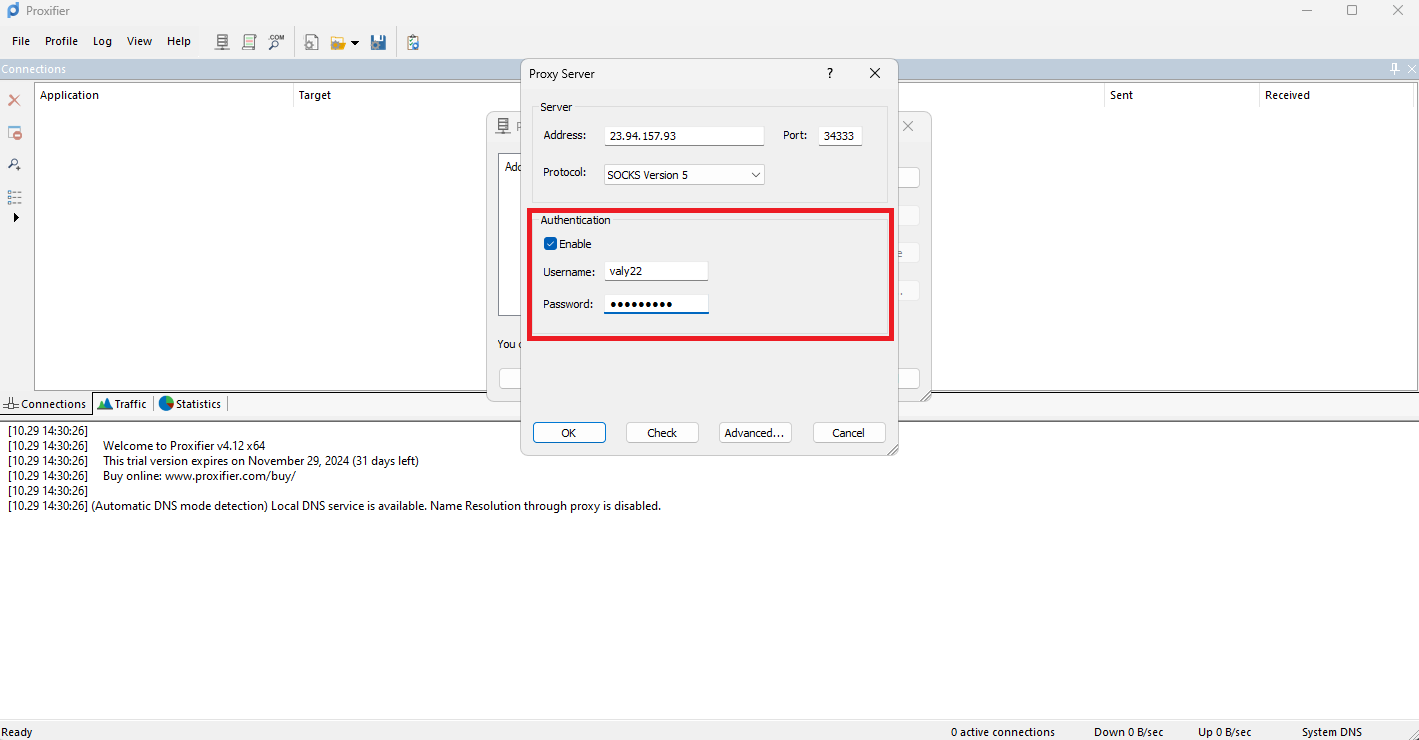
If you are going to use proxies, then you’ll usually need to authenticate access before connecting. There are two main ways to do this: IP whitelisting and credentials. If your proxy provider has already whitelisted your IP, you’re good to go and can skip this step. Otherwise, simply check the Enable box under Authentication, enter your username and password in the designated fields, and hit OK to confirm.
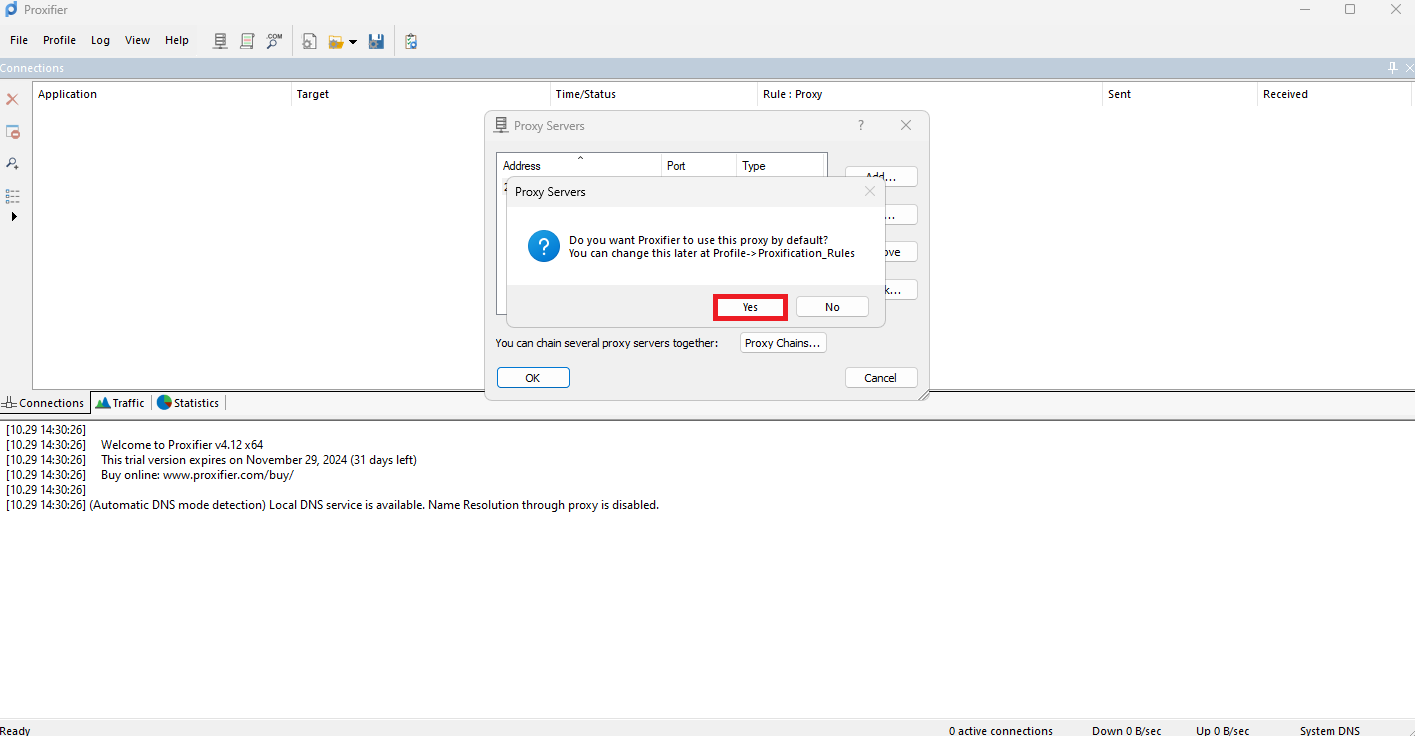
Now, after you entered your credentials, a prompt will open and it will ask you if you want to set the proxy you've entered as default. You can modify this setting later under Profile -> Proxification Rules.
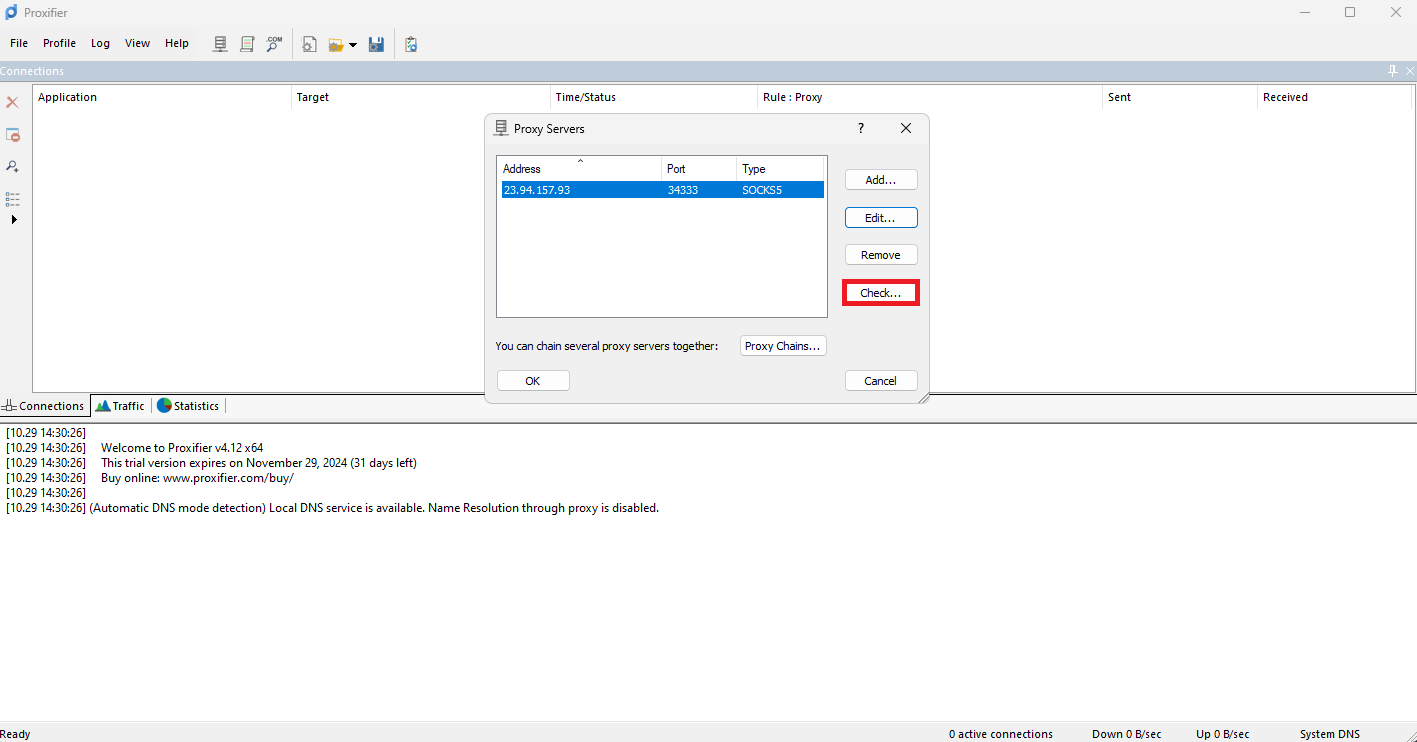
You should have all of your proxy settings in place right now, so it's time to test the connection. Here’s how to confirm that Proxifier is properly routing traffic through your proxy:

www.google.com) and a Port (e.g., 80), letting you confirm access to a particular site through your proxy.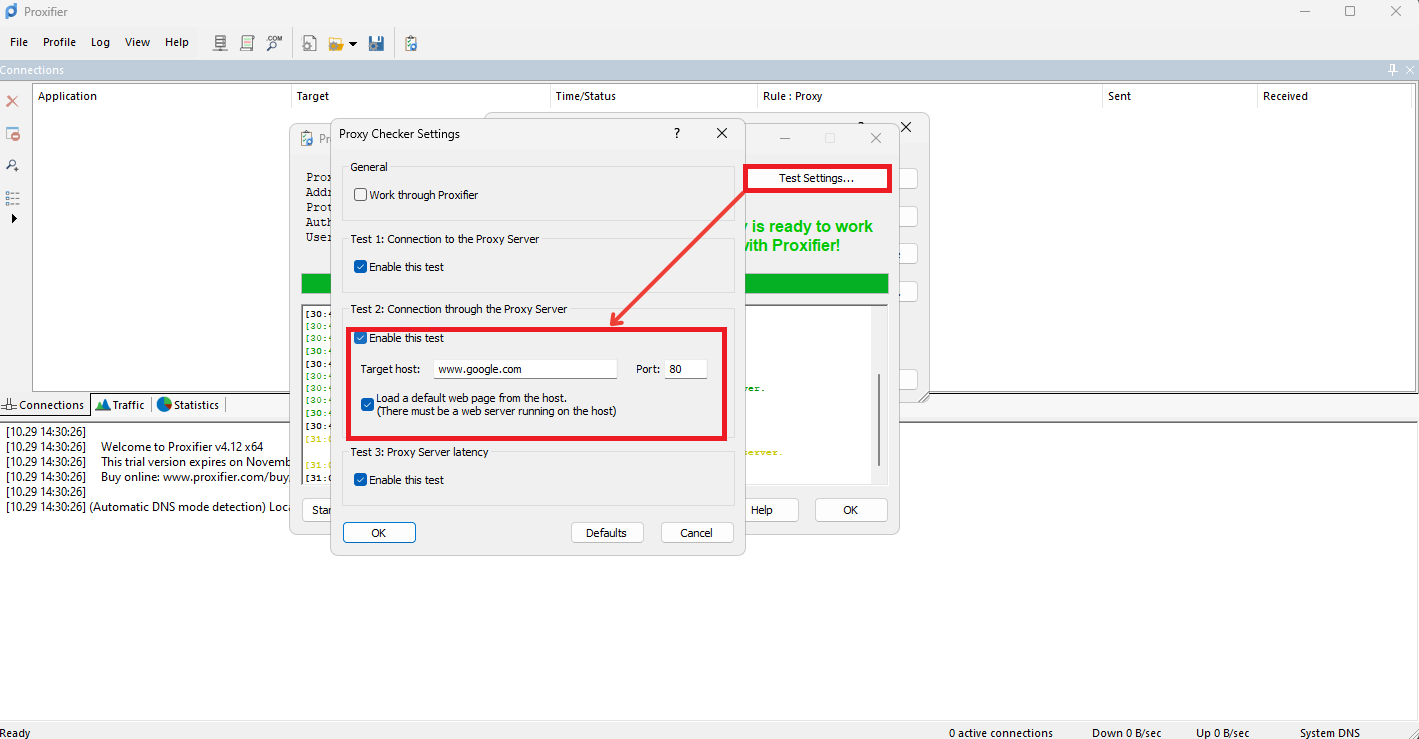
That’s it! Your Proxifier setup is now complete and all network requests are routed through your chosen proxy.
@2025 anonymous-proxies.net