How To Set up FoxyProxy with Anonymous Proxies
First, download the FoxyProxy extension in your browser, either Chrome or Firefox. Once installed, follow this step-by-step guide and be ready to have your proxies set up in just a few minutes.
Setting up FoxyProxy on Chrome
Step 1: Open FoxyProxy Options
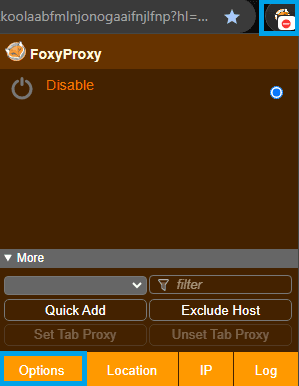
After you installed the extension locate the FoxyProxy icon in your browser toolbar and click on it. From the drop-down menu, click on Options.
Step 2: Add a New Proxy
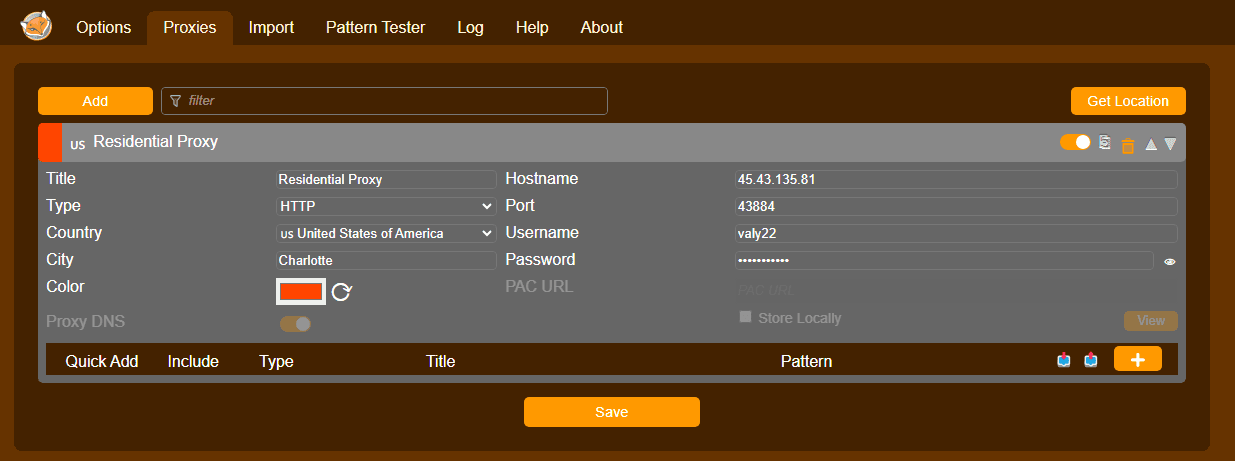
On the Options page, click the Proxies tab and then click on the Add button.

Step 3: Enter Proxy Details
Now, the Proxy Settings will pop-up and here you are supposed to fill in all the details of your proxy. Start by giving your proxy a name, for example: Residential Proxy. Then choose the type of your proxy, HTTP or SOCKS5. Add the Hostname and the Port number which you can find in the Anonymous Proxies Dashboard. If authentication is required, your Username and Password are the same as the ones from dashboard. You can also give a color label to this profile, for easier finding.
Step 4: Optional - Pattern Rules
You can turn on the Pattern Rules feature and have fine-grained control over how your proxy handles the traffic. Whitelisting or blacklisting can be done by using a particular URL or wildcards and regular expressions for broader filtering. If you want to skip this, just click the "Save" button.

Step 5: Enable Proxy Profile
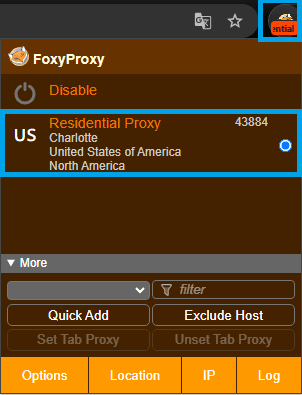
For the final step, click on the FoxyProxy icon and select your new proxy profile.
Setting up FoxyProxy on Firefox
Step 1: Open FoxyProxy Options
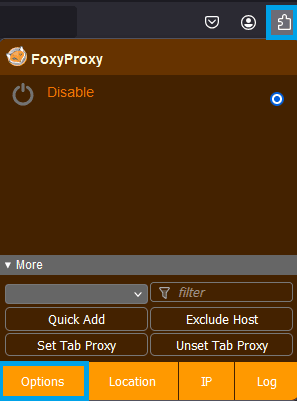
After installing the FoxyProxy extension, click on the FoxyProxy icon in your browser menu and select "Options".
Step 2: Add Proxy
Once you’re on the Options page, click the "Add" button located under the Proxies tab.

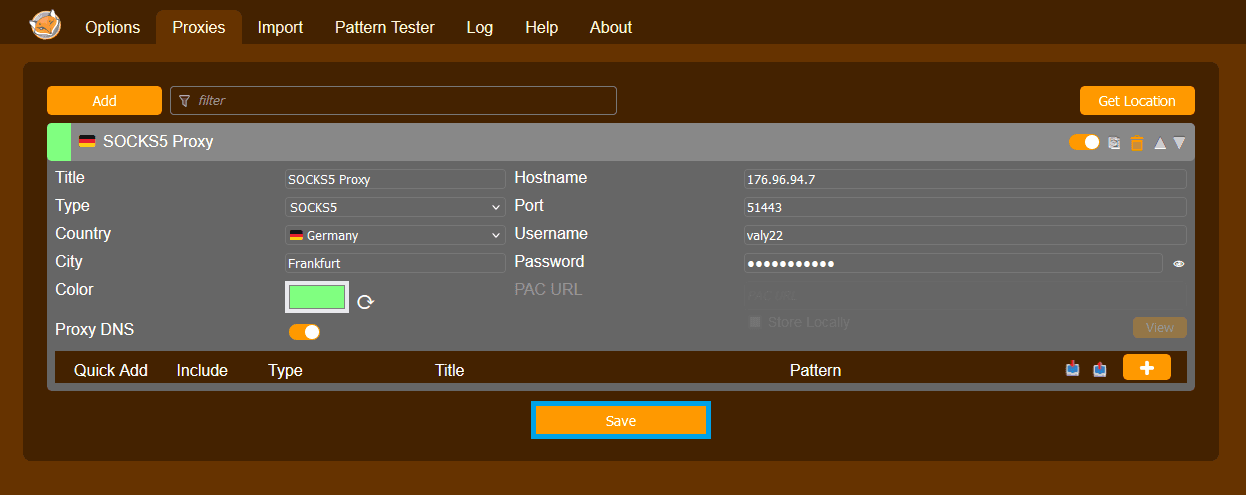
Step 3: Input Proxy Details
In the proxy configuration window, fill in the required fields:
- Title: Assign a name to your proxy profile (e.g., "SOCKS5 Proxy").
- Type: Select the proxy type, such as SOCKS5 or HTTP.
- Hostname: Enter the IP address of your proxy server.
- Port: Add the port number provided by your proxy service.
- Username/Password: Enter your credentials if required by the proxy.
You can also assign a color to the proxy profile for quick identification.
Now, you can also enable the optional Pattern feature which works the same as the one from Chrome. If you enable it, you can filter how you want the traffic to flow through the proxy and if not, after you've entered all the necessary details, click "Save".
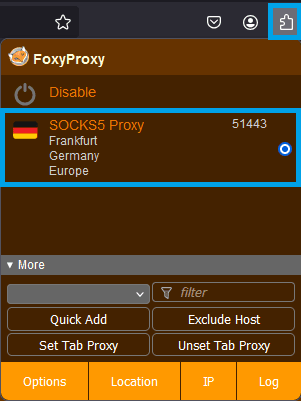
Step 4: Enable the Profile
For the final step you need to click on the FoxyProxy icon and from the drop-down menu select the profile you just created.
Final Words
You are now all set up and ready to work with FoxyProxy, which is a very useful browser extension with incredible features. Whether you’re browsing with Chrome or Firefox this step-by-step guide ensures that you have all the information you need to integrate Anonymous Proxies with FoxyProxy.
If want to see more integrations with other third party software or tools, take a look at our integration page. And if you need help, our support team is always ready to assist you, so don't hesitate to contact us.