

This tutorial will show you how easy it is to set up Anonyomus Proxies with BitBrowser in just a few simple steps.
HTTP Proxies are handling HTTP requests towards the internet on behalf of a client. They are fast and very popular when it comes to any kind of anonymous web browsing.
SOCKSv5 is an internet protocol that is more versatile than a regular HTTP proxy since it can run on any port and traffic can flow both on TCP and UDP. Useful in games and other applications that do not use the http protocol.
BitBrowser is a cutting-edge anti-detect browser designed for individuals and businesses that require a secure and isolated browsing environment. Its core function is to enable smooth account management on any platform without the risk of getting flagged or banned. In essence, it allows the creation of separate browser profiles, each with a different digital fingerprint, ensuring your activities are untraceable and not linked from one another.
Be it management of social media accounts, e-commerce, or advertising campaigns, BitBrowser is the perfect tool to help maintain anonymity and ease your work.
Keep in mind that BitBrowser comes with 10 free browser profiles in its package, but to fully take advantage of it, it's essential to pair it with our residential proxies.
First thing you need to do is to install the BitBrowser version that matches your operating system. For this tutorial, I will use the Windows version.
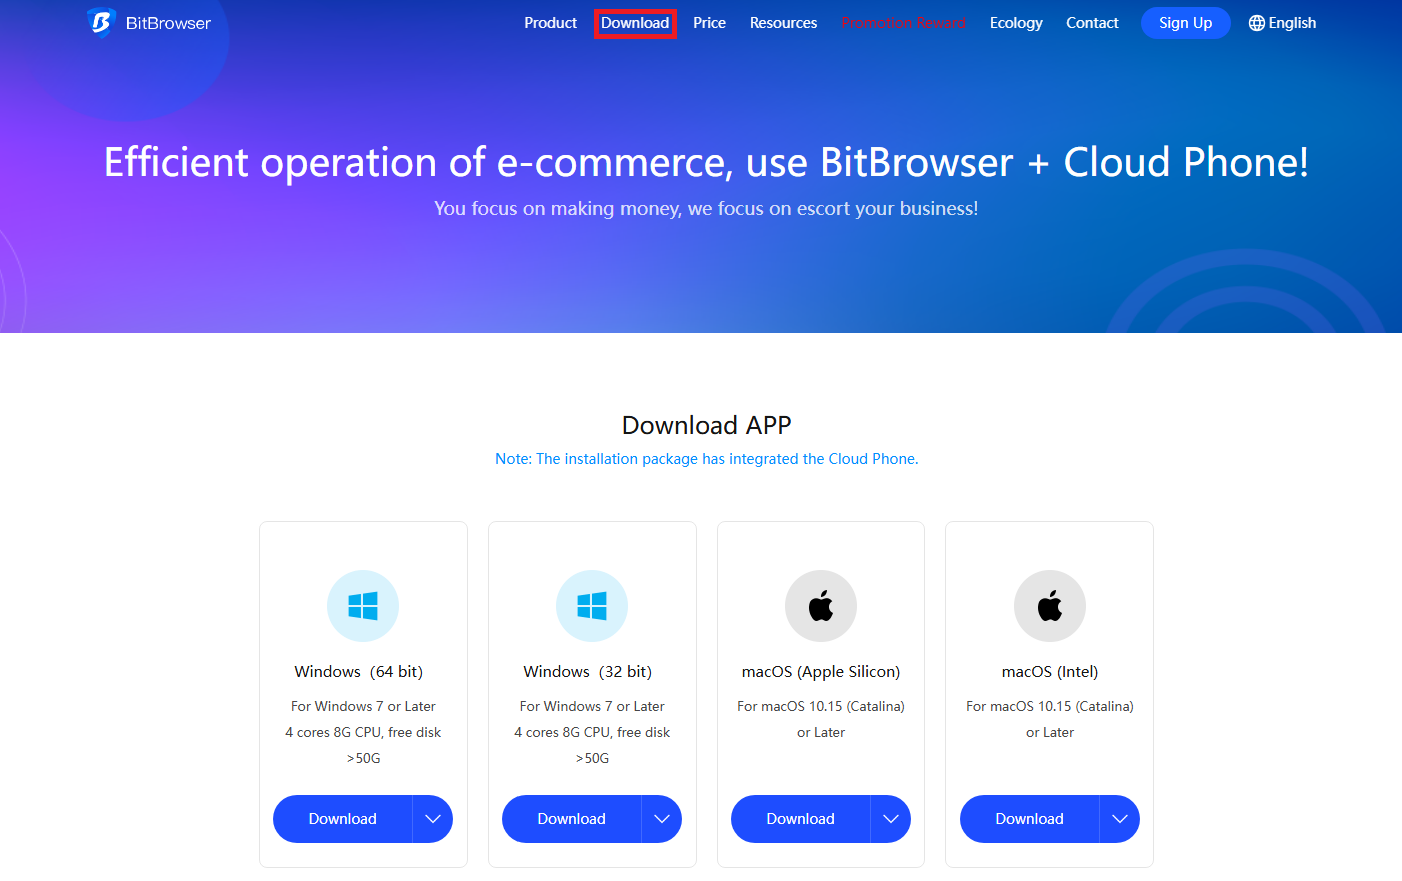
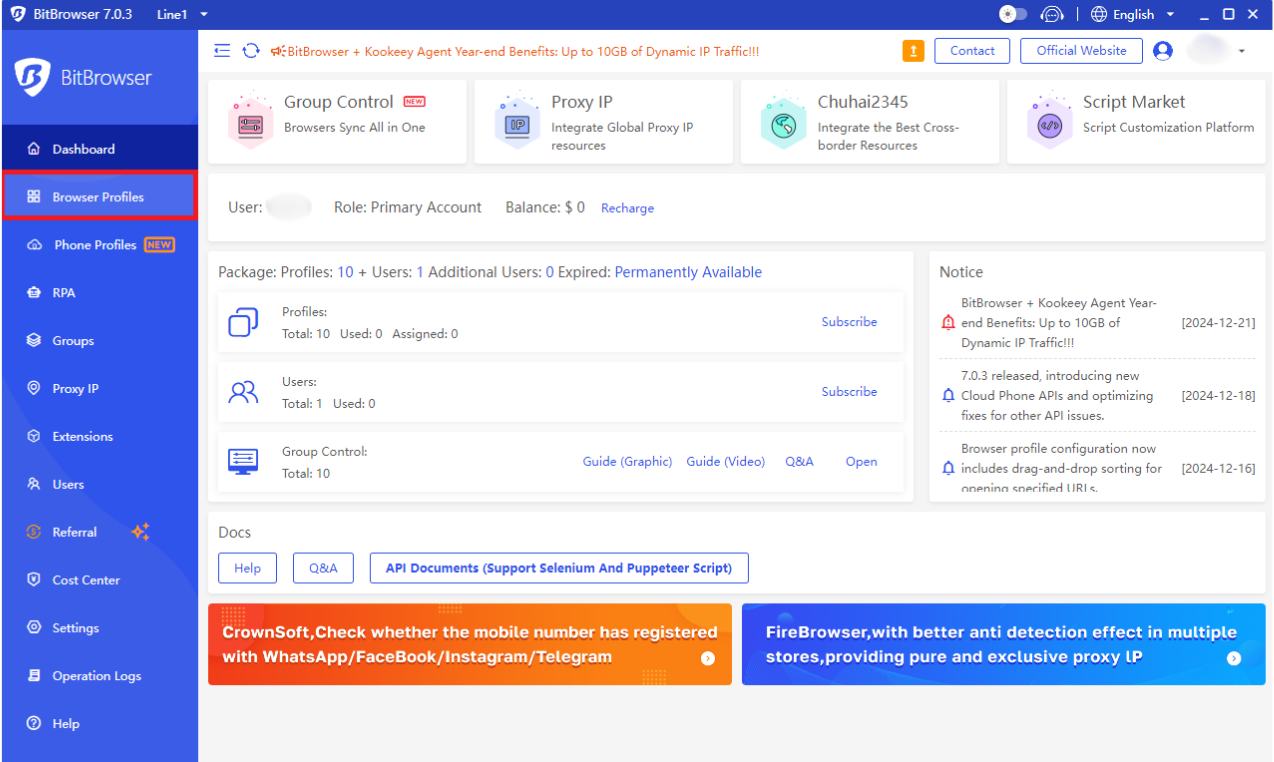
Once you downloaded BitBrowser, you need to log in into your account. Once logged in, you’ll be able to access their dashboard.
Now, you need to click the "Browser Profiles" button.
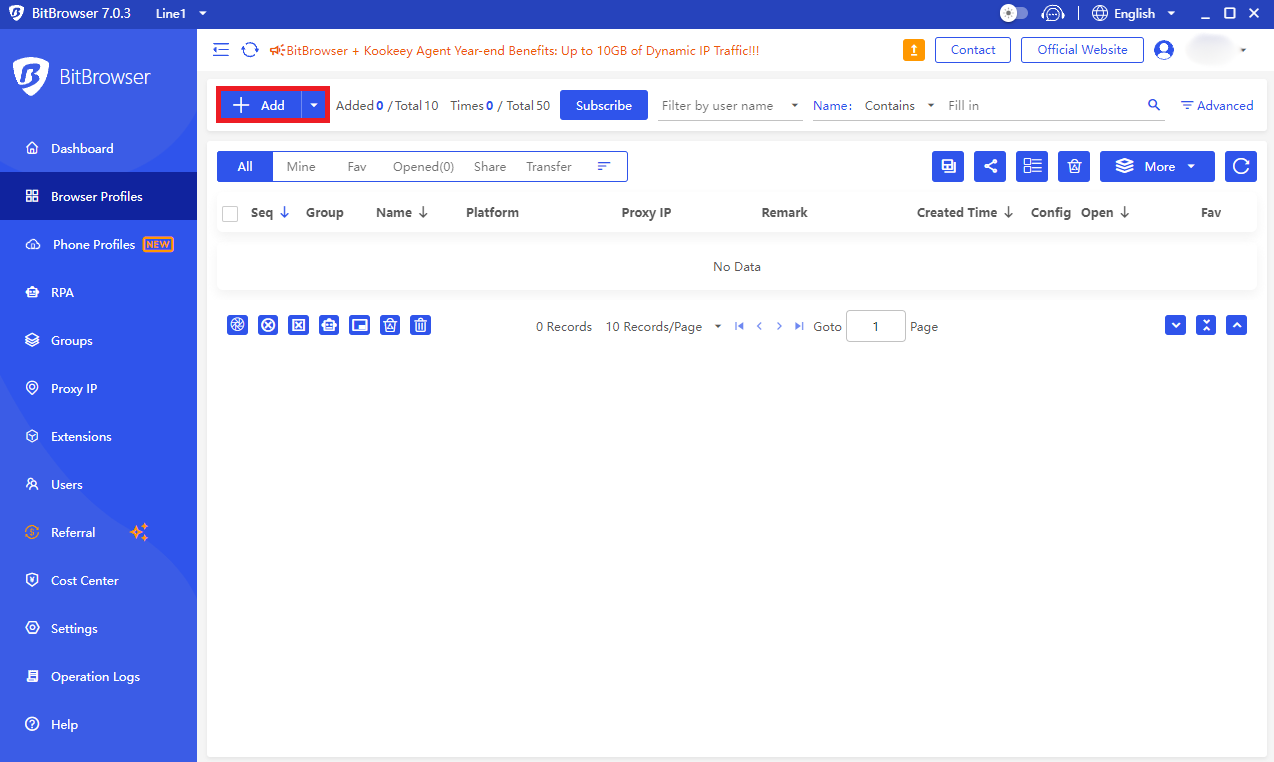
Once you are on the "Browser Profiles" page, you need to click the “Add” button to add a new BitBrowser profile.
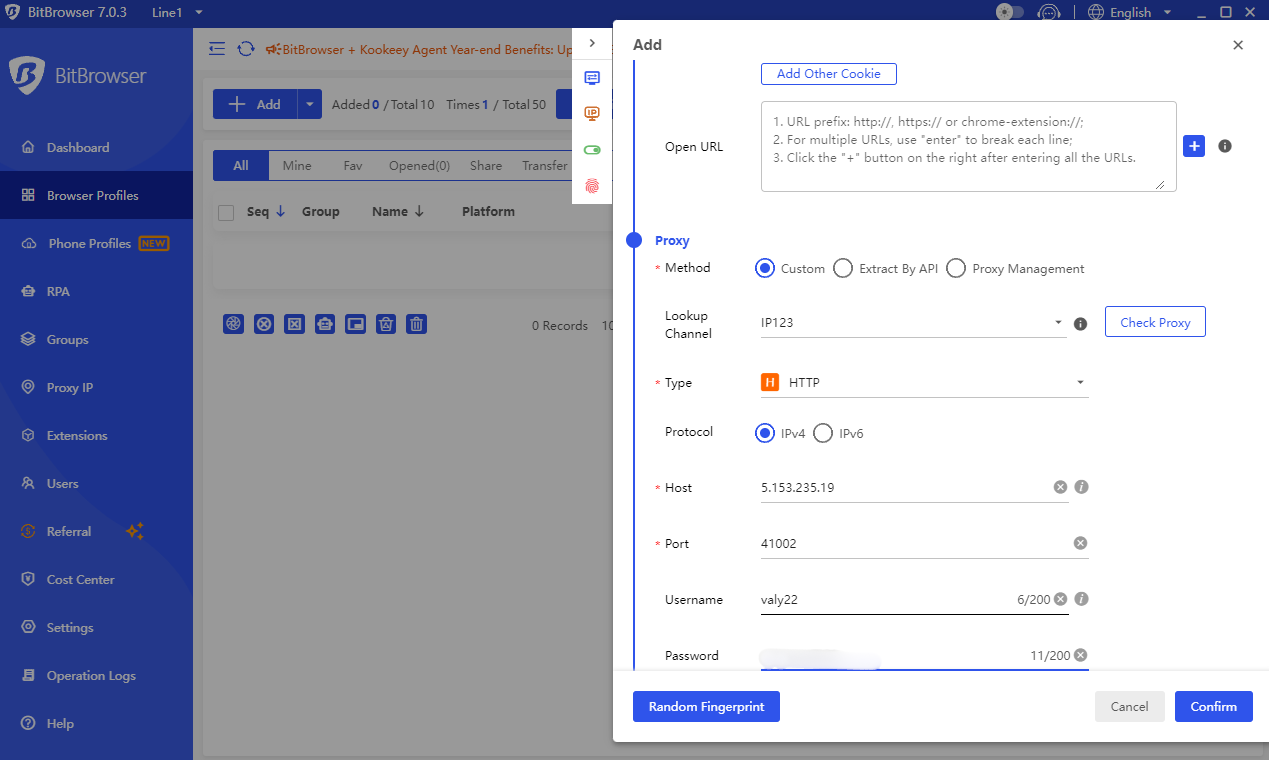
Here, you can name your profile, assign it to a group for better organization and adjust other parameters if needed. Once you've completed these fields(optional), you can scroll down to the proxy configuration section.
Here, you need to select the "Custom" option to input your proxy details manually. Before you do this, be sure that you go to Anonymous Proxies Dashboard to see all of your credentials. Then you just need to fill these fields out:
Now, just click on "Confirm".
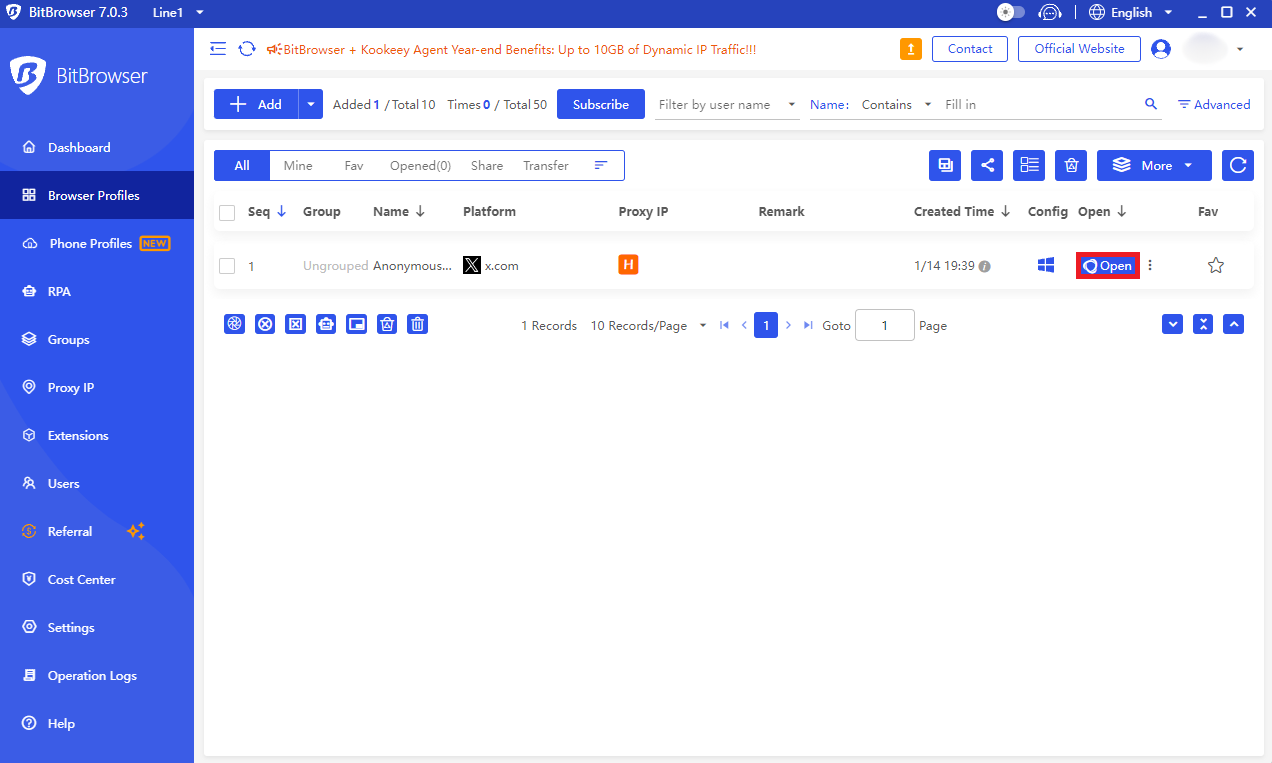
Your new profile will now appear in the Browser Profiles list.
To use it, be sure that you click the “Open” button next to the profile.
For the final step, be sure that the opened browser matches your IP. If it's a fit, then you are good to go.
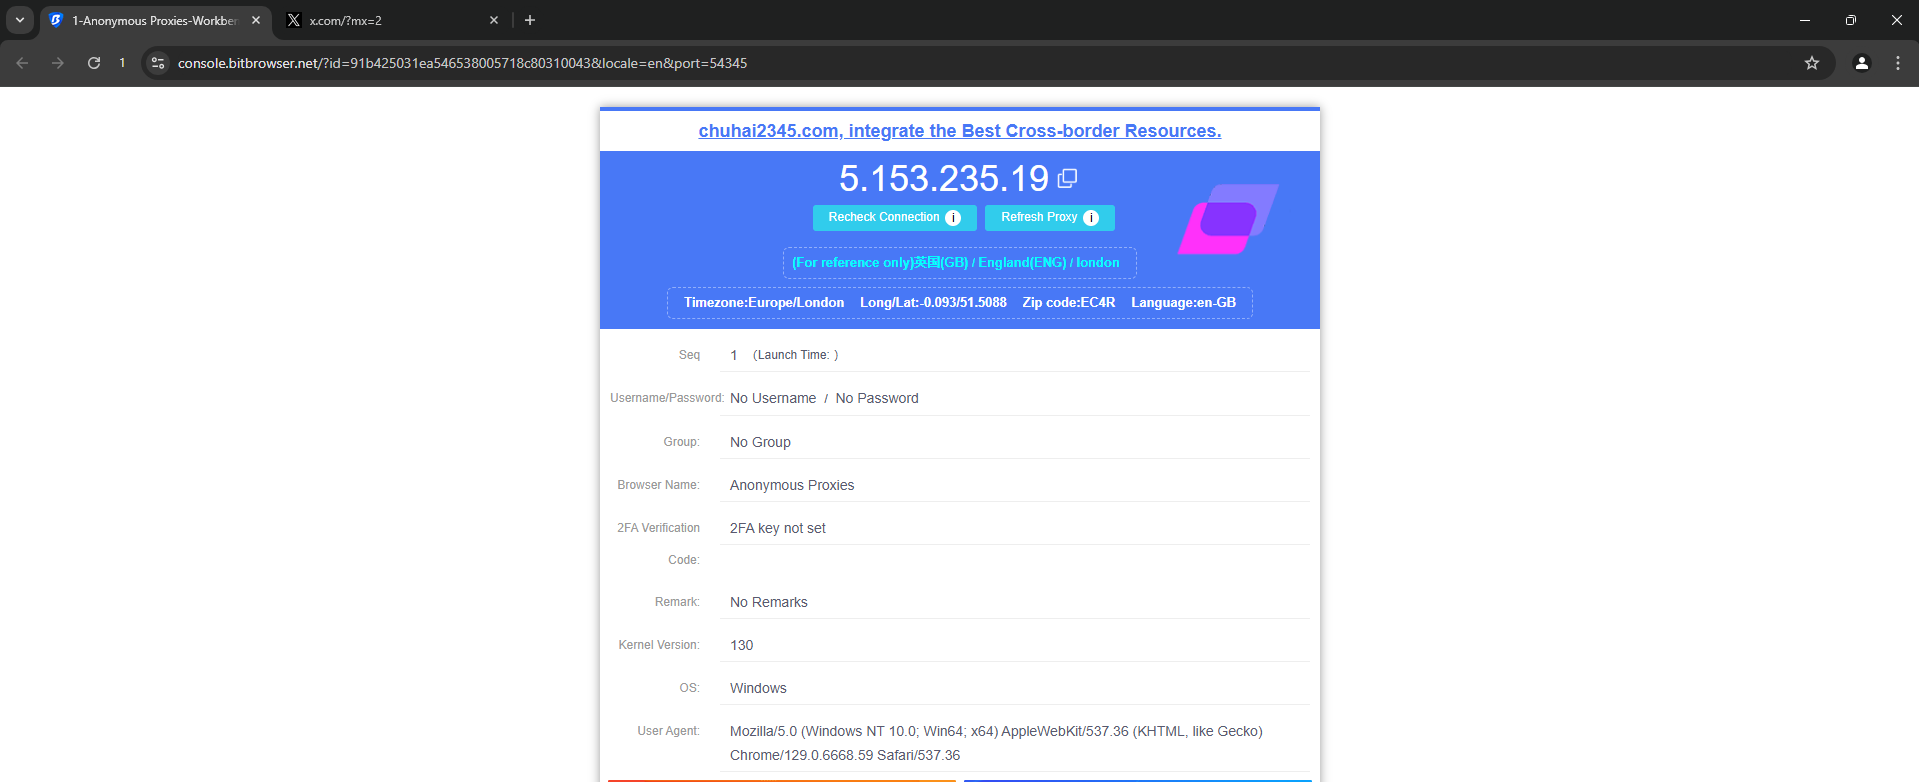
And that's it! Now you've successfully integrated Anonymous Proxies with BitBrowser.
By combining BitBrowser with our high-quality residential proxies, you can rest assured that your management of multiple accounts will become a breeze. Whether you want to scrape data or ease your e-commerce operations, BitBrowser will make it a no-effort job for you.
For more integration tutorials, be sure to check our integrations page.
If you have any questions about how to integrate Anonymous Proxies with BitBrowser or any other issues, feel free to contact our 24/7 support team that is here for you.
@2025 anonymous-proxies.net